Mapping informal bus routes
This tutorial shows how to add informal bus routes to OpenStreetMap. For this tutorial to be effective you need JOSM installed and the custom mapping tool (when requirred by your community). In order to upload your changes to OSM you need also your JOSM installation synced with your OpenStreetMap account.
Preparing our workplace
-
Open JOSM (this tutorial assumes that you have it already).
-
A window should pop up like
-
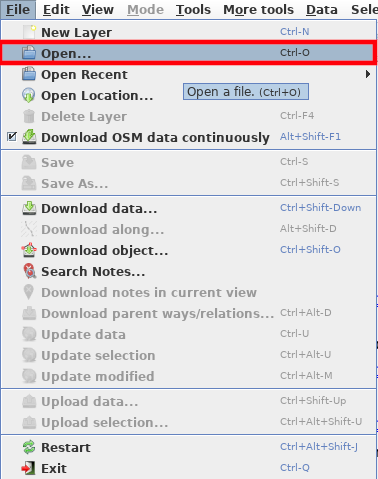
First we should load the data you received from your community. Click on File in the topbar:

-
Then we click Open in the menu:
-
A dialog appear and prompts you to select the file you've received from your community. Go to the location where you saved the
*.geojson, click on that file and then Open: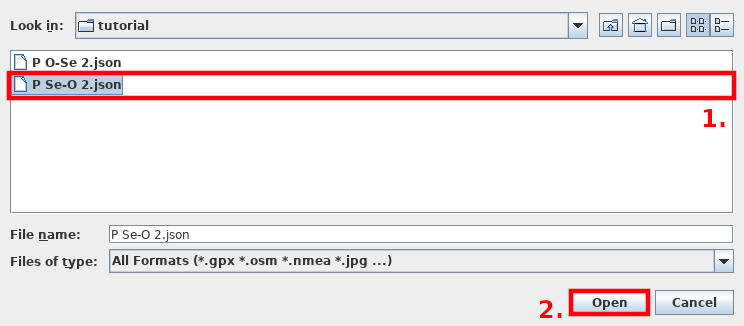
-
Wait for loading process to finish. Once finish the user interface changes significantly. What we see now is our editor:

-
Before we can start mapping we need to prepare the editor and load OSM data in it. Let us load data from OSM first. Click on File in the topbar again:
-
And then Download data...:
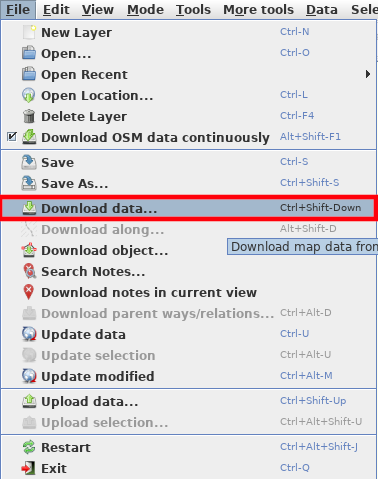
-
We begin to love popups. In this one we probably do not need to tweak the boundingbox you see in the displayed map because JOSM did this for us because we've loaded the
*.geojsonfile: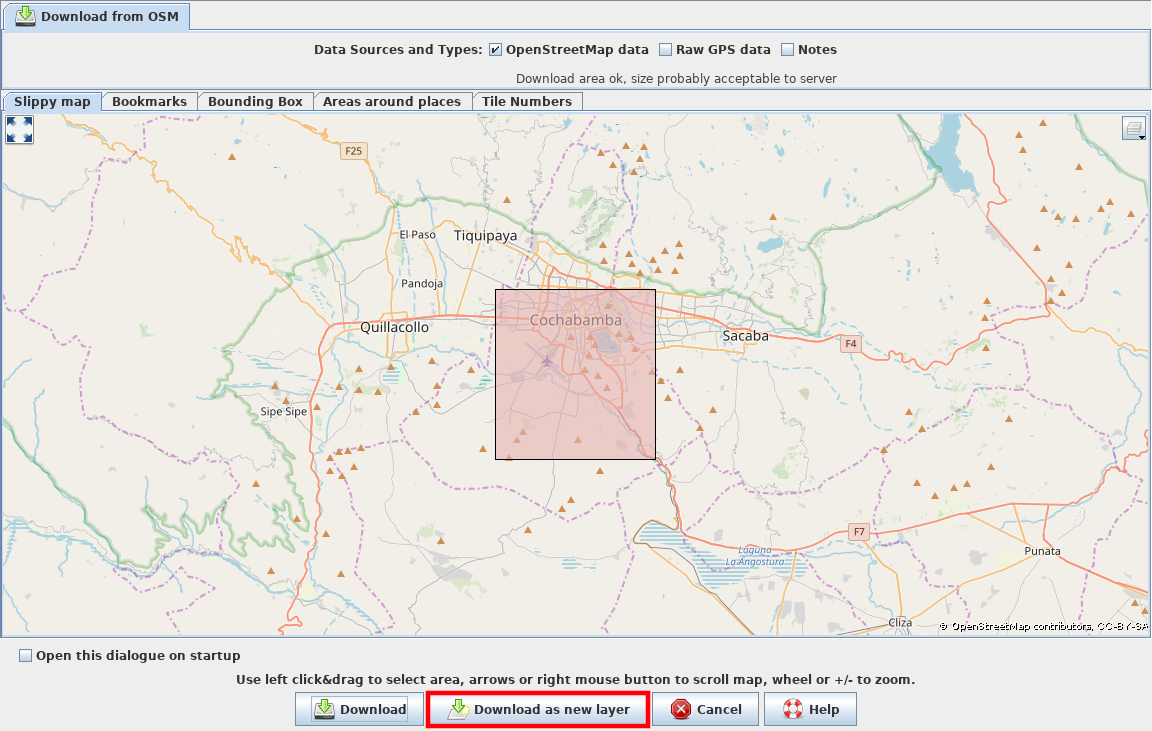
-
Click Download as new layer. If it says that the selected area is to big then resize it by returning to that dialog, click and drag the mouse over a smaller part of the previously selected area. Release the mouse to create a new bounding box. Repeat this step until the system is happy :)
-
This looks more promising:
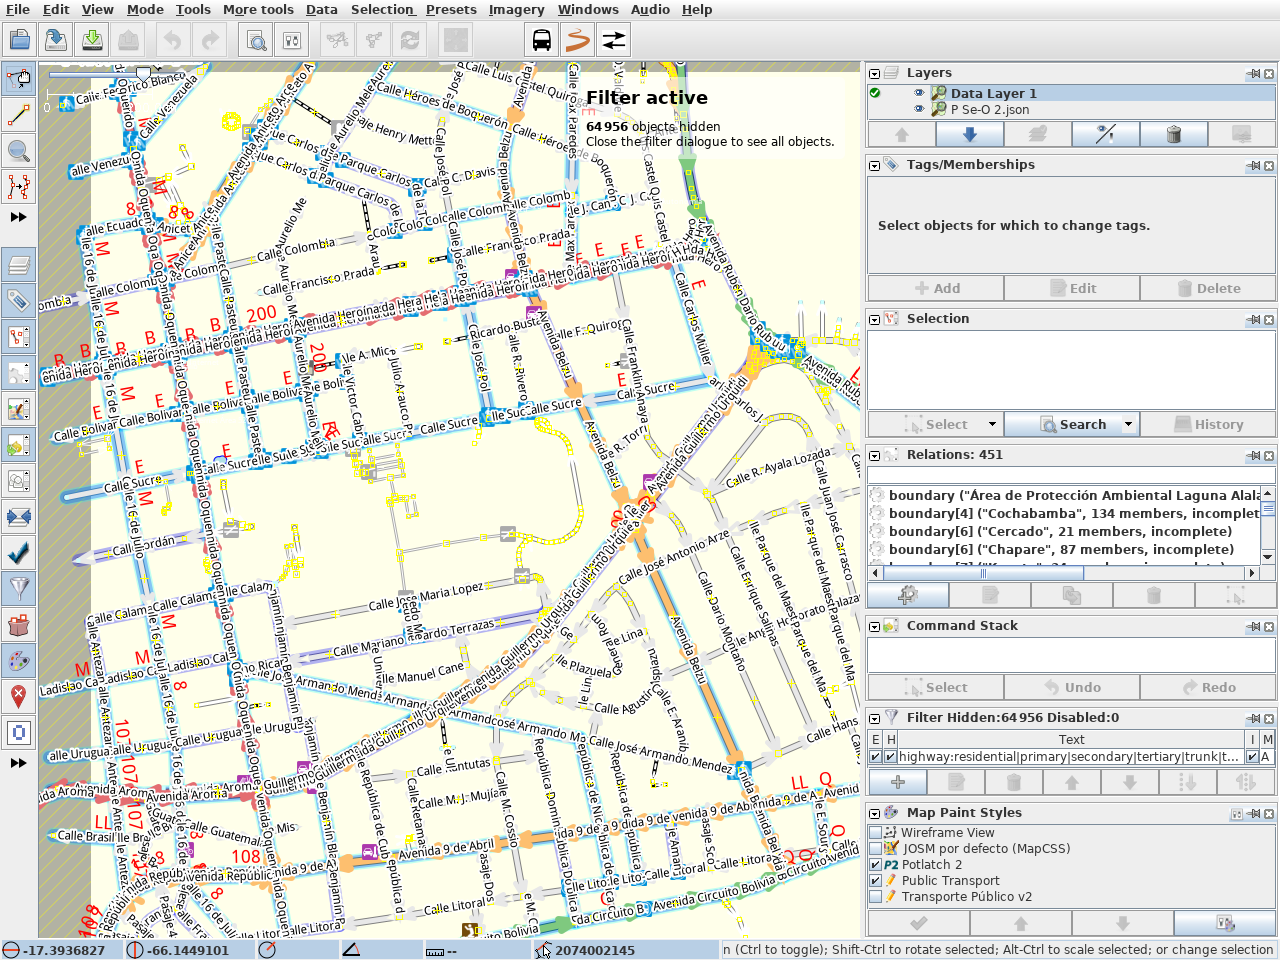
-
But we're not happy yet, aren't we? To make it even more beautiful we need to add the OSM tiles. We go to Imagery in the topbar and then select OpenStreetMap Carto (Standard). Beautiful, isn't it.
-
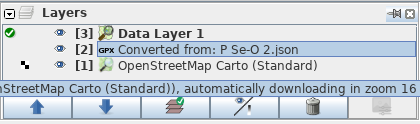
Let us take a quick look on the Layers section on the top right site of the editor.
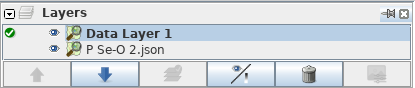
By the way: You can resize the sections by clicking on the respective boundaries and dragging them to the position of your desire.
-
Right click on the entry with the file extension
.geojsonor.json. Then click Convert to GPX layer:
-
The name of the entry changed and looks like this:
-
We right click on the entry again and select
-
Customize Colour at first,
-
Download from OSM along this track at second
-
and Precache imagery tiles along this track at last.
-
-
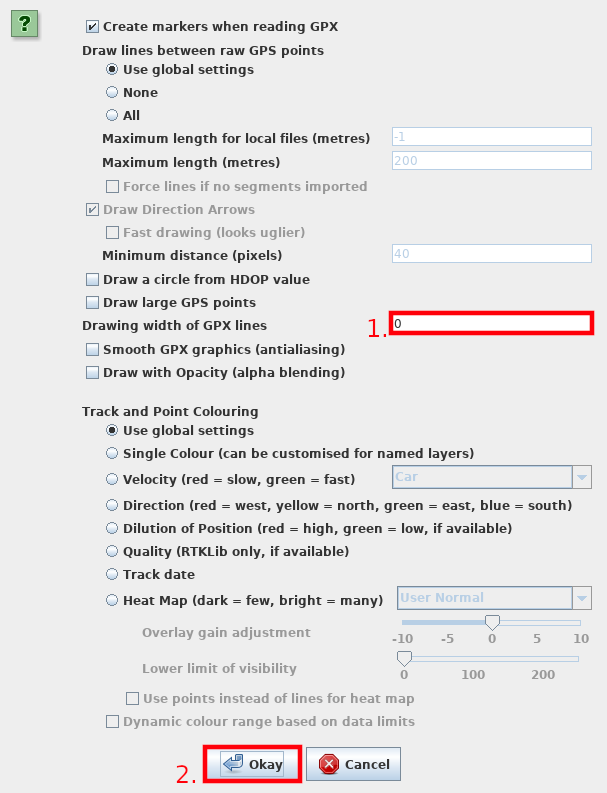
Additionally we click on the entry again and select Customize track drawing and a new popup shows up:
-
In the textfield next to Drawing width of GPX lines type in the width in px. I recommend typing in
5. Then click Okay. -
Press ALT+SHIFT+F1 to stop automatically downloading of data while moving the map. Alternatively click on File in the topbar and then Download OSM data continuously. It's a toogle. Then navigate inside the map to the end of the line. To navigate in the map you need to hold the right mouse key while moving the mouse. Use your mouse wheel to zoom in or out. The line has two ends: end and start. Select the one where the arrows come from and not the end where they point to.
-
End <-- Start
-
-
Preparing OSM data along the route we want to add
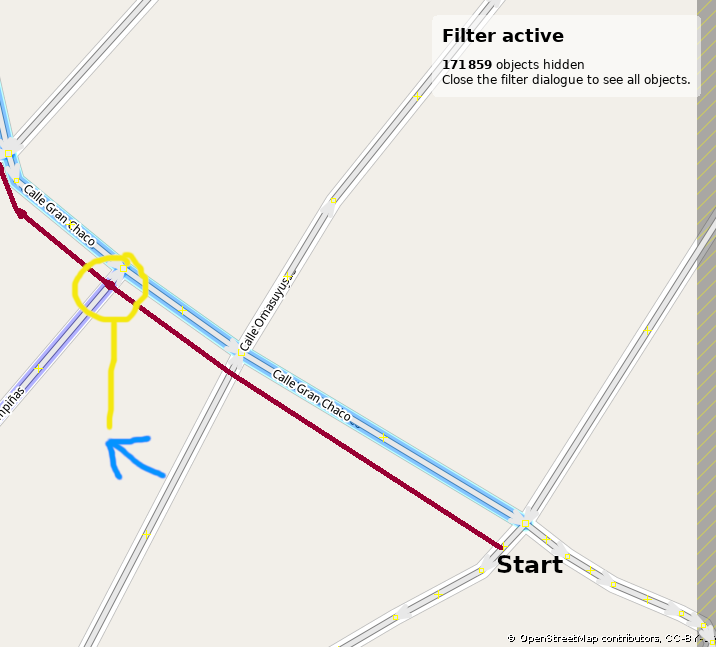
Before we start we need to do some work on the OSM data itself. In the last image you see the darkred coloured line and the blue one. The first line is the bus route and the latter the street in OSM the bus drives. This part of the tutorial covers how to turn the first line into useful data.
Press ALT+SHIFT+F1 to stop/start automatically downloading of data while moving the map. Alternatively click on File in the topbar and then Download OSM data continuously. It's a toogle. When you move the map to a section where no data is available then toggle Download OSM data continuously on. If you use the zoom function extensively then turn Download OSM data continuously off.
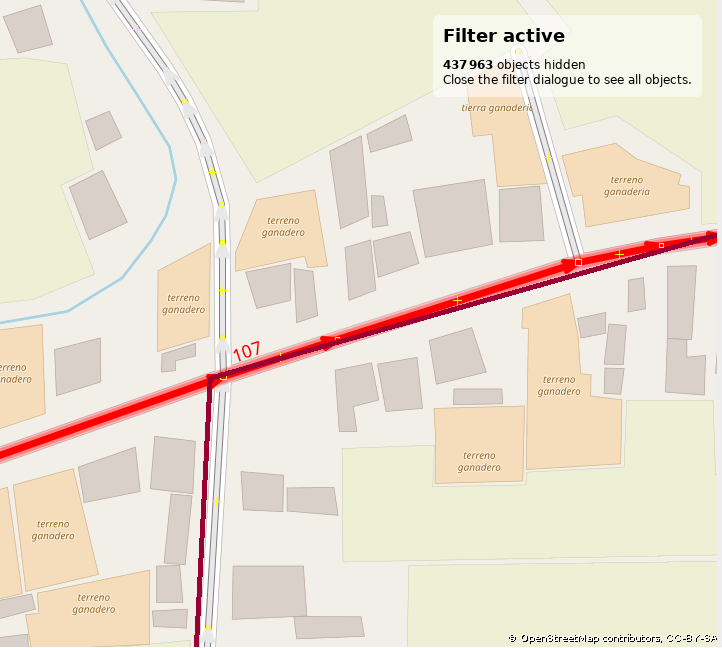
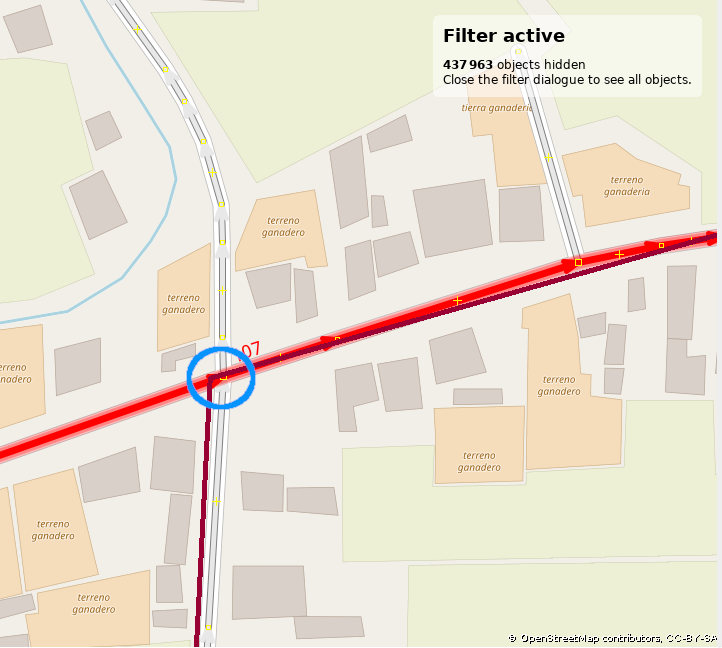
- Select the line which is not the darkred one but which is aligned to it:
- We see not the whole line turns red. What is for us one line (the blue one) is in the eye~~s~~ of the computer not one. The line has been split on the position where Calle Campinas crosses our selected line.
-
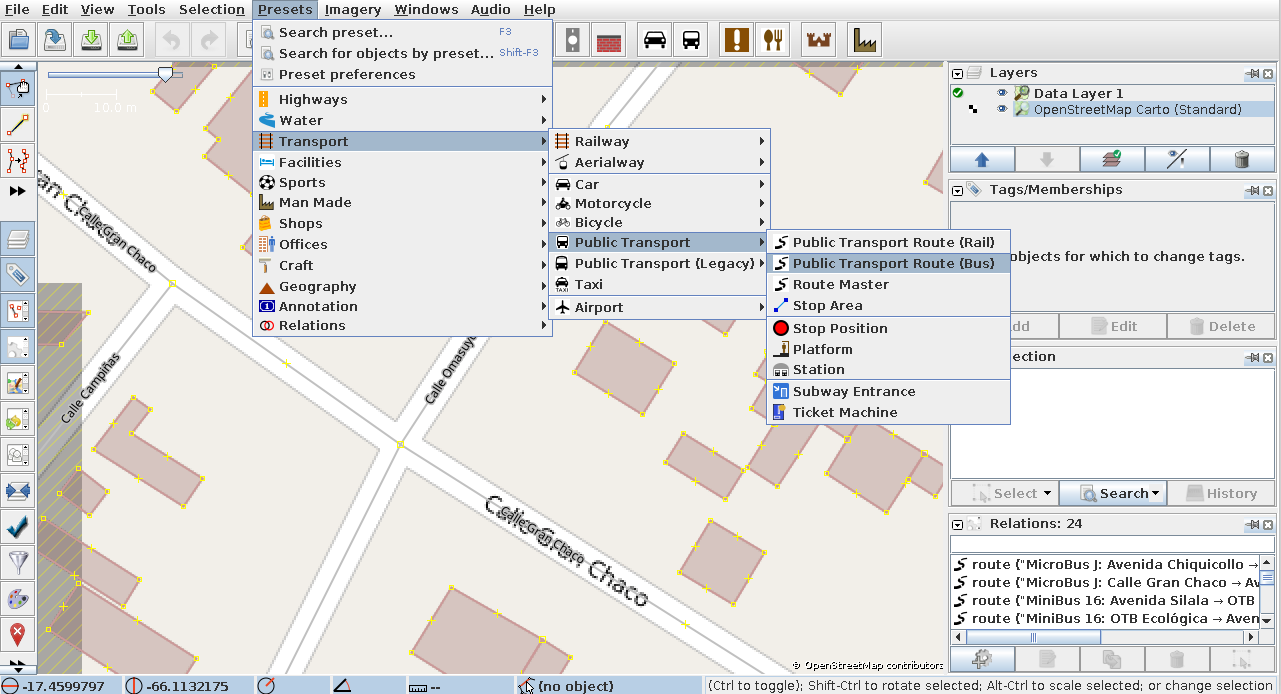
We want to create a route so we click on Presets (in the topbar) --> Transport --> Public Transport --> Public Transport Route (Bus):
-
A popup shows up prompting you for data you've received from your community. Type in the data in the corresponding fields and click Okay. A new window opens up and gives an overview:
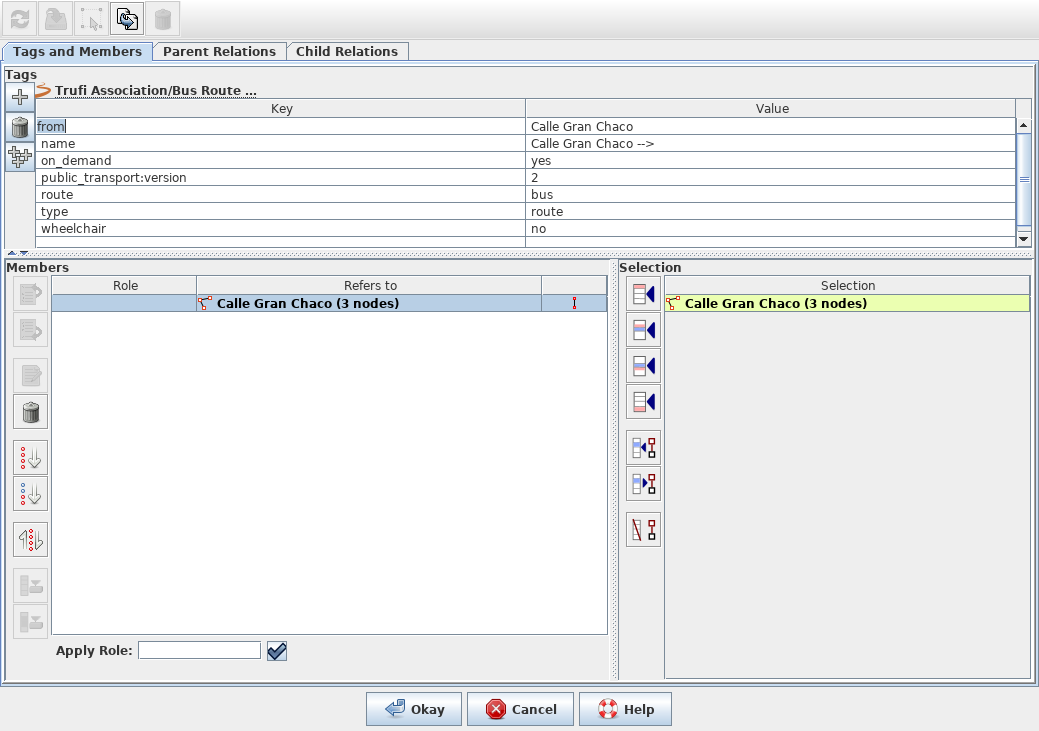
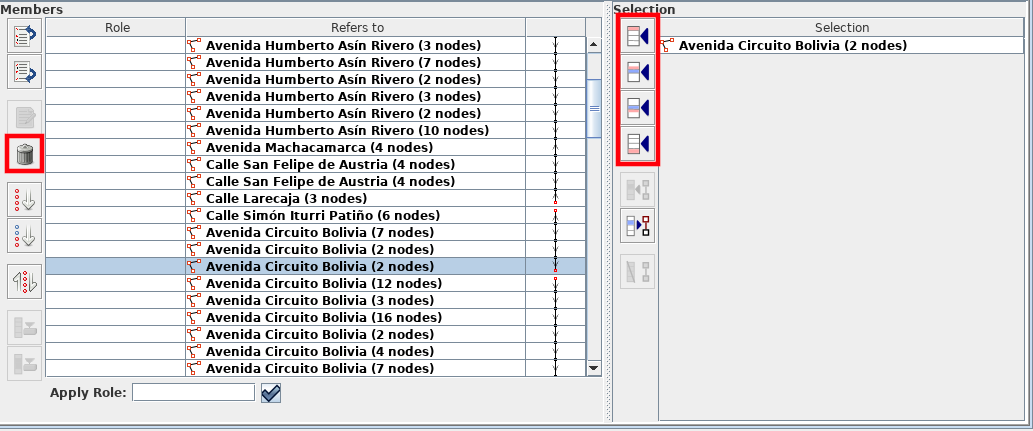
- On the right site you see a list of all objects (streets) you've selected in the JOSM editor. On the left site you see a list of all objects (streets) already added to the relation. Don't close that dialog, we need it!
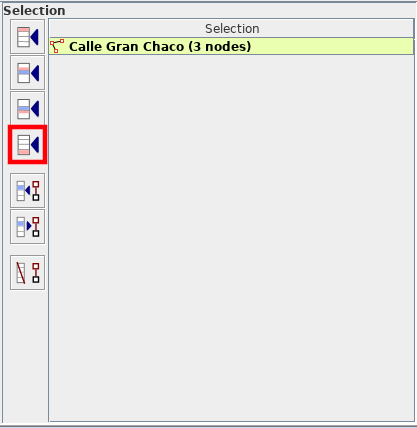
- Select other streets along the darkred line, go to the dialog again and click on the red highlighted entry where the last row of four rows in total is selected to add the selection to the route list on the right site.
 You can select more than one street by pressing and holding the key you use to start a new sentence with an upper letter.
 - Repeat step 6 after you have the following situation:
- Newton, we've got a problem! What do we next is spliting the way. So we click on the map to deselect our selection. Be sure to add all streets except the street in question to the route like in step 6.
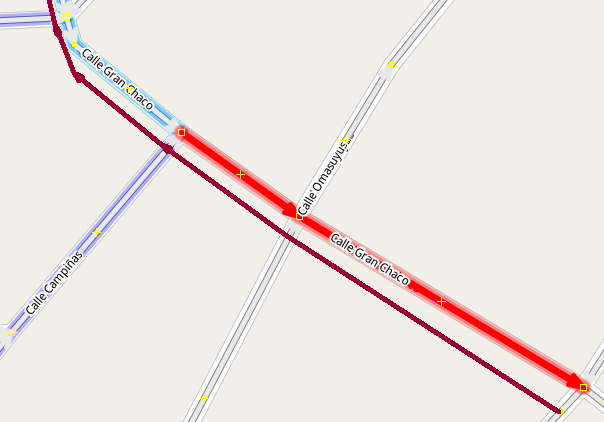
- Select the street (way) in question. Zoom to the point where you need the split:
 Zoomed in (cuted view):
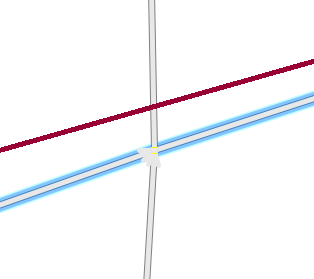
- Select the street (here in blue).
- Hold down the key you use to write an upper letter at the beginning of a new sentence. Select the square (JOSM highlights it yellow) while holding down the key.

- In the topbar click on Tools and then on Split way. Alternatively press key P. A dialog prompts you to decide which way segment should preserve history. Just ignore it and click Okay. Deselect everything by clicking on a free space on the map.
- Continue with step 6 until the end of the darkred line.
- When you reached the end of the darkred line, it means you are almost done. Now we need to validate your work. For that we go to the dialog you should leave open the whole time while mapping.
-
You should consult someone with validation if you're unfamilar with it. It's a critical part. Take a look on the different options the dialog offers you.
-
Select an entry from the list on the left site. Right click on it and click Zoom to to zoom to that object on the map. Use this method to repair objects having the following symbol or similiar:

-
Use the feature Zoom to and the map to find missing ways (streets). and hover on the buttons of the highlighted red area next to the selection table to get what they do with the selection.
-
Black is your friend :) Everything black in the validation line means that the data is okay.

-
The first and last entry show always a red symbol in the validation line because one end is not connected to another way (street). This is logical. A bus route usually ends somewhere.
- In the route list dialog click Okay to create that route. Do it when you think you're finish.
- Click on the Upload icon in the symbolbar right under the topbar:

- Ignore the dialogue Suspicious data found when it popups or fix the issues. Inform your community about that and tell them what you've edited.
- A new popup appears:
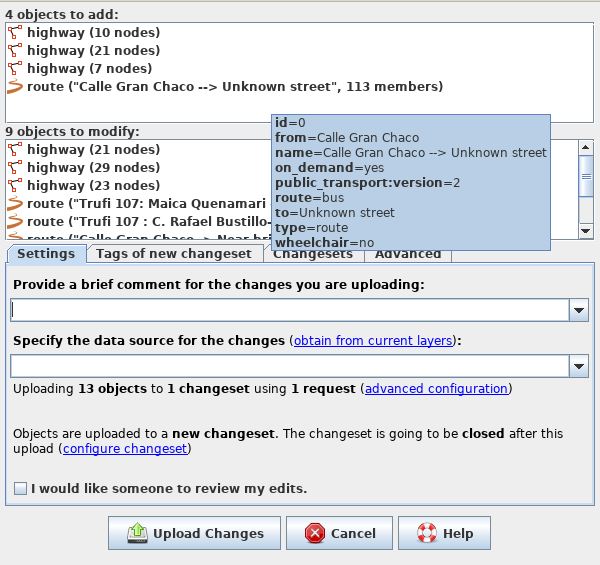
- Fil in the information requested and then click Upload Changes to finish upload process.
-